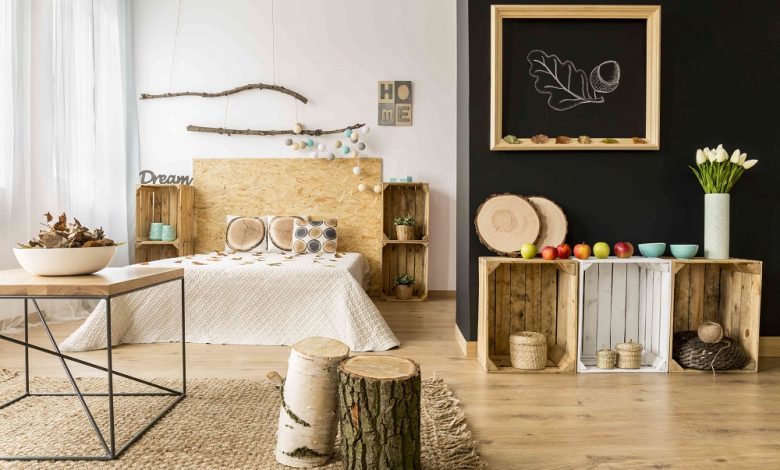
Transforming your living space does not require a massive budget, specialized contractor skills, or an entire weekend of intense labor. Often, the most rewarding home upgrades are the ones you tackle yourself using accessible materials, basic tools, and a bit of creativity. Do it yourself decor allows you0 to inject personality into your rooms, giving your home a curated feel that mass-produced store displays simply cannot replicate.
Taking on simple home projects builds confidence and lets you customize colors, textures, and dimensions to fit your exact spatial needs. Whether you want to refresh a tired entryway, add character to a blank bedroom wall, or bring organic life into your kitchen, these straightforward DIY projects require minimal experience yet deliver high-end visual results.
Refreshing Walls with Oversized Wall Art
Blank walls can make even a well-furnished room feel unfinished, but high-end artwork from galleries often comes with a steep price tag. Creating your own large-scale statement art is surprisingly simple and allows you to dictate the exact color palette for your interior.
-
Canvas Painting with Texture: Purchase a cheap pre-stretched canvas from a craft store. Mix joint compound with acrylic paint to create a thick paste, then apply it to the canvas using a putty knife or an old credit card to form sweeping ridges, geometric lines, or organic movement.
-
Fabric Wrapped Panels: Cut a piece of patterned or textured fabric, such as raw linen or heavy cotton, slightly larger than a blank wood frame or a piece of plywood. Wrap the fabric tightly around the edges and staple it securely to the back for an instant fabric tapestry.
-
Pressed Botanical Frames: Collect interesting leaves, ferns, or pressed flowers from your yard. Arrange them between two panes of clear glass inside a floating frame to create minimalist, nature-inspired wall decor.
Upcycling Glass Jars and Bottles Into Vases
Instead of tossing glass jars, wine bottles, and food containers into the recycling bin, you can convert them into chic decorative vessels. Glass adds a clean, reflective quality to surfaces and works well in any room style.
-
Faux Ceramic Treatment: Glass jars can look remarkably high-end with a simple paint technique. Pour a small amount of matte acrylic paint inside a clean glass jar, swirl it around until the interior is completely coated, and turn it upside down on parchment paper to let the excess drain out.
-
Twine Wrapped Accents: Apply hot glue to the base of a glass bottle and wrap natural jute twine tightly around the body upward until the glass is fully concealed. This adds immediate coastal or rustic warmth to a bookshelf or dining table centerpiece.
-
Etched Glass Designs: Use adhesive stencils and glass-etching cream to permanently frost simple geometric patterns or monograms onto plain glass drinking glasses or storage jars.
Upgrading Lighting with Custom Pendant Shades and Sconces
Lighting dictates the mood of a room, but standard builder-grade light fixtures often lack character. You can easily upgrade basic pendant cords or table lamps with custom handmade shades.
-
Woven Basket Pendants: Take an inexpensive lightweight woven straw basket, cut a small hole in the center of the bottom base, and thread a pendant light cord kit through the opening. Hang it over a dining nook or bedroom corner for instant organic texture and soft filtered light.
-
Yarn Wrapped Lampshades: Transform a plain drum lampshade by wrapping thick wool yarn or cotton cord around it in alternating sections, securing the strands with fabric glue as you go.
-
Swag Hook Adjustments: Instead of hardwiring new fixtures into rental homes or tricky ceilings, use decorative swag hooks to drape plug-in pendant cords gracefully across ceilings and down walls to highlight reading chairs or desks.
Crafting Functional Storage Solutions
Clutter is the enemy of stylish interior design, but storage containers do not have to be purely utilitarian. Making your own organizational pieces ensures they match your aesthetic while keeping surfaces clean.
-
Pegboard Display Boards: Paint a standard wooden pegboard in a color that matches your wall, frame it with thin strips of wood, and mount it in a home office, kitchen, or mudroom. Insert matching wooden pegs and small shelves to hold mugs, notebooks, or potted plants.
-
Rope Coiled Baskets: Take thick cotton clothesline rope and a hot glue gun. Coil the rope into a tight flat circle for the base, then continue building the walls upward in a spiral until you have a sturdy catch-all basket for keys, mail, or throw blankets.
-
Floating Wooden Ledges: Cut a length of standard dimensional lumber to size, sand the wood smooth, and mount it to wall studs using hidden heavy-duty brackets. These ledges provide a rotating display space for framed family photos, art prints, and small trailing plants.
Introducing Greenery with Hanging Planters
Plants breathe life into indoor environments, but counter space and window sills fill up quickly. Utilizing vertical space with handmade plant holders keeps your surfaces open while adding natural greenery at eye level.
-
Macrame Plant Hangers: Using basic cotton macrame cord and simple square knots, you can weave a sturdy hanging holder for ceramic pots or glass bowls in less than an hour. Hang them near sunny windows or in empty room corners.
-
Leather Strap Plant Shelves: Cut a thick strip of leather or faux leather to length, loop it around a small potted plant, and secure the ends to a wooden wall peg. This creates a minimalist, modern cradle that floats your plant directly against the wall.
-
Painted Terra Cotta Pots: Plain clay pots are inexpensive and porous, making them ideal for plant health. Tape off geometric patterns with painters tape and coat the exposed sections with colorful exterior acrylic paint for a modern, color-blocked look.
Personalizing Textiles and Soft Furnishing Accents
Soft goods bring tactile comfort to a room, but store-bought pillows and throws can be generic. Adding custom details to basic textiles elevates your entire decor scheme.
-
Stenciled Throw Pillows: Buy plain canvas pillow covers, tape down a stencil design in the center, and use a fabric ink roller or brush to apply permanent textile paint. Once dry, slip them over your pillow inserts.
-
Pom-Pom Edging: Purchase basic cotton curtains or throw blankets and use fabric glue or a needle and thread to attach a row of colorful or neutral yarn pom-poms along the bottom hem or outer edges for playful texture.
-
Tie-Dye or Shibori Linens: Take plain white cloth napkins or lightweight table runners and fold, clamp, or bind them tightly before dipping them in indigo dye to create unique, organic patterns for your dining space.
Frequently Asked Questions
What are the best tools to keep on hand for beginner DIY home decor projects?
Essential tools for beginners include a hot glue gun, a sharp utility knife, a tape measure, a level, a basic staple gun, a pair of fabric scissors, and a multi-surface craft paint set, which allow you to tackle most no-sew and no-carpentry projects easily.
How can I make handmade decor items look professional rather than childish?
To avoid a homemade look, focus heavily on clean lines, precise measurements, and a cohesive color palette. Choose high-quality base materials like natural woods, thick cottons, and matte paints, and avoid mixing too many clashing patterns or bright primary colors in one space.
Are there any simple DIY projects suitable for temporary apartment rentals?
Yes, renters can easily use command hooks for lightweight wall hangings, peel-and-stick contact paper to cover worn countertops or cabinet fronts, tension rods to hang fabric room dividers, and freestanding modular shelving units that require zero wall mounting.
What is the easiest way to give old wooden furniture a modern update without stripping paint?
You can modernize outdated wooden furniture by thoroughly cleaning the surface, applying a coat of bonding primer, painting it in a contemporary matte color, and swapping out dated hardware like brass handles for modern matte black or brushed nickel pulls.
How do I protect DIY painted items from chipping or water damage?
To ensure durability, always prep your surfaces by cleaning away dust and oils. For wooden or metal items, apply a clear acrylic sealer or polyurethane topcoat in a matte or satin finish to protect against everyday wear, moisture, and scratches.
Can I do woodworking projects without owning a table saw or heavy power tools?
You can complete many woodworking projects without heavy power tools by purchasing pre-cut lumber from your local hardware store, using wood glue and finish nails for assembly, and relying on hand sanding blocks to smooth out rough edges.
How can I safely hang heavy handmade wall art without damaging drywall?
For heavier DIY items, always locate wall studs using a stud finder and drive screws directly into the wood framing. If studs are unavailable, use heavy-duty rated drywall toggles or anchors designed to support the specific weight of your hanging piece safely.